To bridge your assets between Avalanche and Optimism, you will need a Web3 wallet like MetaMask or Trust Wallet and a secure cross-chain bridge. This article will discuss, "Avalanche Bridging: How to Bridge from Avalanche to Optimism". Let's get started.
Avalanche Bridging: How to Bridge from Avalanche to Optimism
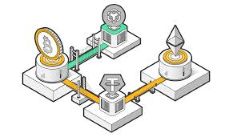
To securely bridge assets between the Optimism Layer 2 network and the Avalanche C Chain network, follow the step-by-step instructions below.
Step 1: Get a Web3 wallet
It's nearly impossible to bridge your assets between chains without a wallet. Use the safe Web3 wallet MetaMask to send and receive digital currency. You can download this app from either your browser or mobile app stores.
Step 2: Setup your Wallet
The networks Avalanche and Optimism should now be added to your Metamask. With Chainlist, this may be done automatically. Start by going to chainlist.org, logging in with your MetaMask, searching for Avalanche and Optimism, and adding them to your wallet. It should just take three minutes to complete.
Step 3: Visit the Synapse protocol
Go to the bridge protocol and connect your wallet. Select the networks you want to send from and that you want to send to. Input the number of assets you want to transfer from Avalanche to Optimism.
Step 4: Approve the transaction
When you've inputted the desired amount you want to bridge, click on the “Bridge Token” button and confirm the transaction. The bridging process should take between 1 - 2 minutes.
Avalanche Bridging: How to Bridge from Avalanche to Optimism - hopefully, this article can help you to get some knowledge.